Photoshop Tips | How To Create Custom Borders and Frames in Photoshop
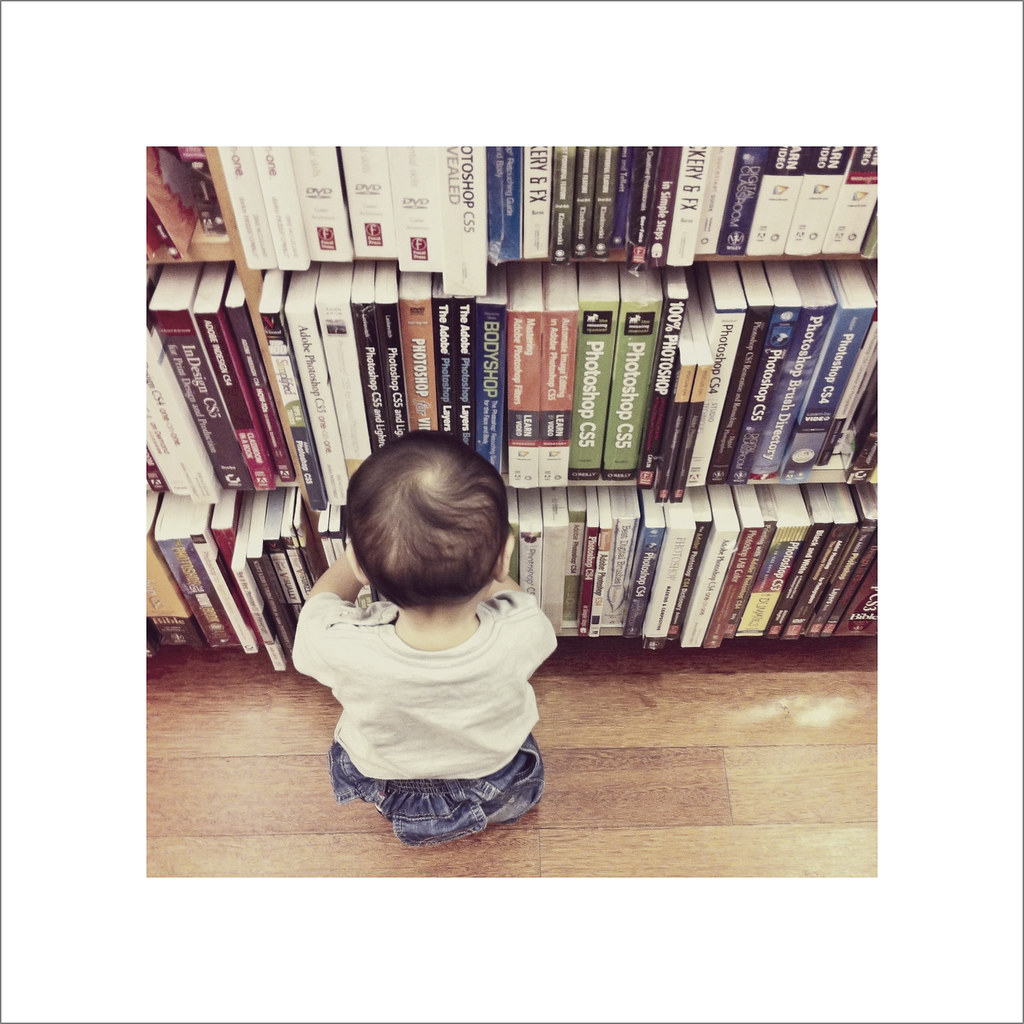
© 2012 Wazari Wazir | Raphael at Kinokuniya Bookstore
There are many ways to create a custom borders or frames in Photoshop and what I’m trying to share it here is among the few ways that you can do it in Photoshop. Here I will show you how to get just the same border like the picture above.
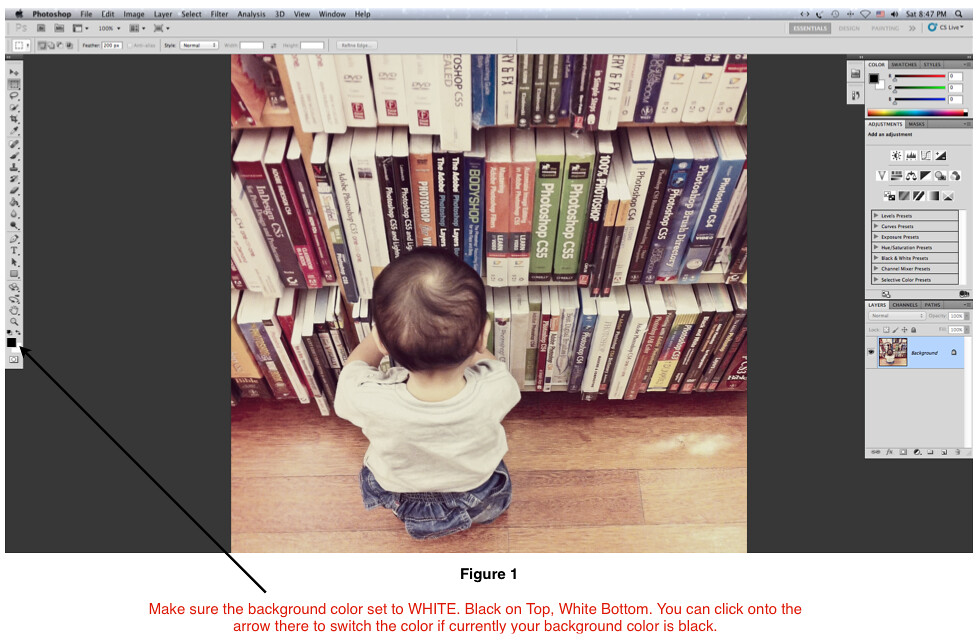
© 2012 Wazari Wazir | Change Your Background and Foreground Color
STEP 1 : Before we get start, please make sure that you change the background color into white because we wanted a white border to frame our picture, yes you can have any color you like but for this tutorial and especially to beginners, you need to know where to get start, and how you can change the background color. So if currently your background color is black, you can change it to black by clicking onto the small arrow there just above the tiny box there (look at the arrow), if you wanted to get a new color, just click onto the box itself.

© 2012 Wazari Wazir | How to Add New Canvas Size in Photoshop
STEP 2 : Once you are done, just go to IMAGE > Canvas Size and change the Width and Height to PERCENT, you can change it by clicking onto the small up and down arrow there. You can have any size that you want, you may like small frame or big frame, if you wanted a small frame, maybe five percent or ten percent will do the job but here, I put it to forty percent, just put any value as you wish but make sure you click the RELATIVE box there. Make sure also that The ANCHOR is pointing outside, if the anchor pointing inside, you are doing something wrong, we want to expand the size of the picture and not shrink it.
© 2012 Wazari Wazir | Custom White Border
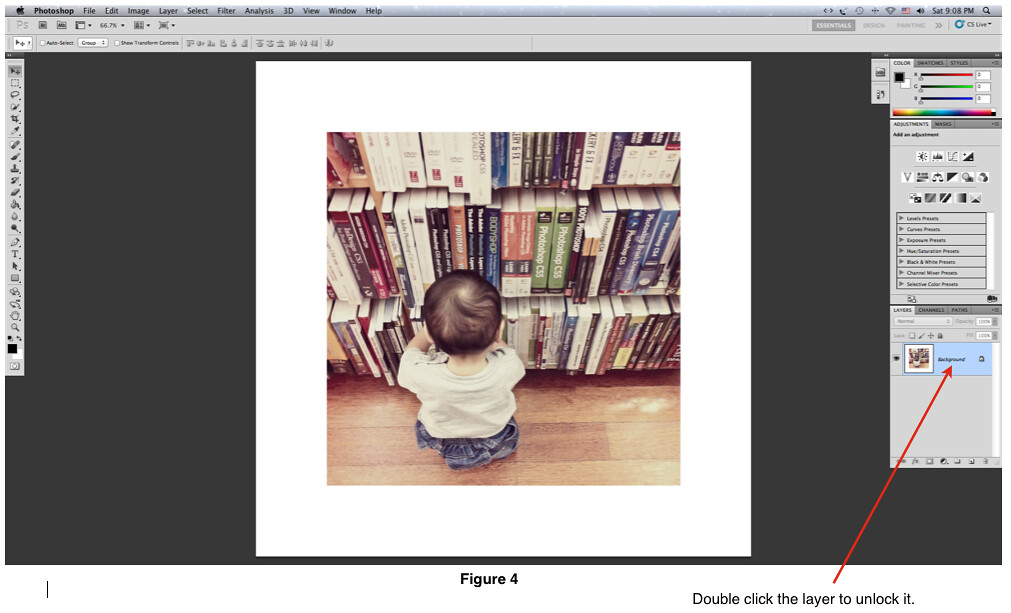
If you do it right you should be able to get something like this but before we go any further, please make sure you unlock the layer by double clicking onto the layer and when a new dialogue box appear just click ok, to set your layer free. Yes you can save the picture if you are happy with the frame but this is still not finish yet, especially if you wanted to share your picture into your blog or Facebook which have white background, you need to have another frame or border, otherwise your picture will look small but if that is what you desire, then, you don’t have to go any further, just save it but if you want to add another black border, just follow the next step.

© 2012 Wazari Wazir | Now Your Layer is Free
The reason why you must free or unlock your layer is that, in order to perform the next step, your layer must be unlocked, otherwise you may not be able to perform the next step. If you don’t trust me, you can follow the next step without unlock your layer, and I wish you good luck.
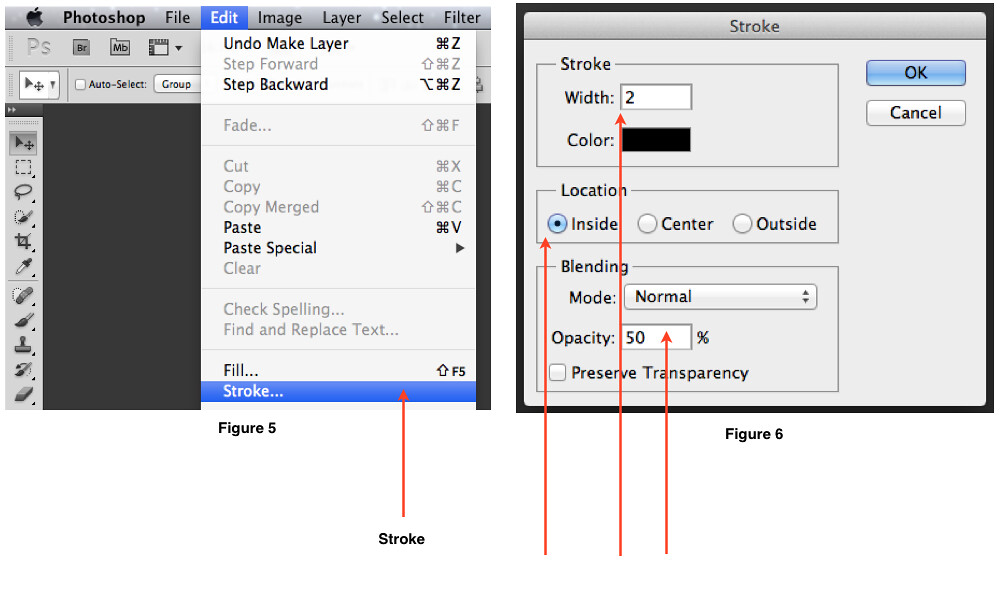
© 2012 Wazari Wazir | How To Add Black Border in Photoshop
STEP 3 : Once you unlock your layer, the next step is go to EDIT > STROKE, we just wanted a small border, so I just put number two here, yes you can put any value but for the picture above, the first one in this post, I’m using stroke number 2, you can use any number, the larger the number, the larger the border or the stroke. If you don’t like black border, you can just click onto the color box and change the color, I wanted my border to be in black, so I chose black.Make sure the location is INSIDE and not outside, you can try OUTSIDE and see the result, maybe you like it, I don’t know but I chose INSIDE. Blending Mode I put to NORMAL and OPACITY I put to 50 %, if you anted your black border to be light in color, you can put it somewhere between 20-30%, you will get a lighter black color or any color that you choose. Once you’re done, click OK>
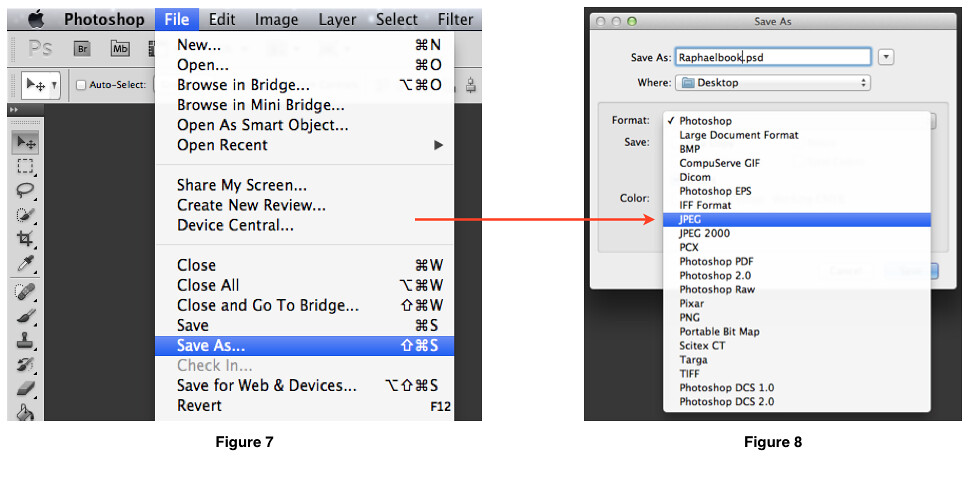
© 2012 Wazari Wazir | Finish and SAVE Your Masterpiece
Actually I don’t need to show you how you can Save your Masterpiece but for the benefit of the beginner, I will show you how because I believe if you have few years of Photoshop experience under your belt, you will never waste your time following this tutorial, so this one for a new user. So the next step is go to FILE > Save As, actually this file by default will be saved in PSD file because we have unlocked the layer, so we need to change it to JPEG, so under FORMAT, there, just change it to JPEG and you’re done, you new file name should be something like this Raphael.jpg instead of Raphael.psd.
So there, you are, if you need help, feel free to use the comment box below and I will try to help you within my limited knowledge…
*Related Post : How To Make Your Own Preset

One Comment
safaaz80
thanks..
sharing is caring!