Photoshop | How To Make Your Own Photoshop Preset
The truth to be told is I rarely use Photoshop Preset, simply because most of my pictures need a different treatment, need a different adjustment, but for those of you who have purchase my Photoshop Tone eBook and wanted to know how to “Save” those adjustment especially “Tone Curves Adjustment”, so every time you wanted to get that same color tone, you don’t have to manually adjusting them, instead you just choose from custom preset and hit the button and you’re done.
In this tutorial, I will share how to make your own Curves Preset in Photoshop. I’m not going to tell you how to make a beautiful Tone Curves or anything, I will tell you how to save those adjustment as a Preset, so you don’t need to manually adjusting those graph each and every time you want to edit your picture. Preset will save you a lot of times if you have few photos to edit.
Like I said before, I’m not going to show you how to get a beautiful color tone with Curve but instead I will show you how to save those “Curves” as a Photoshop Preset, here’s how…
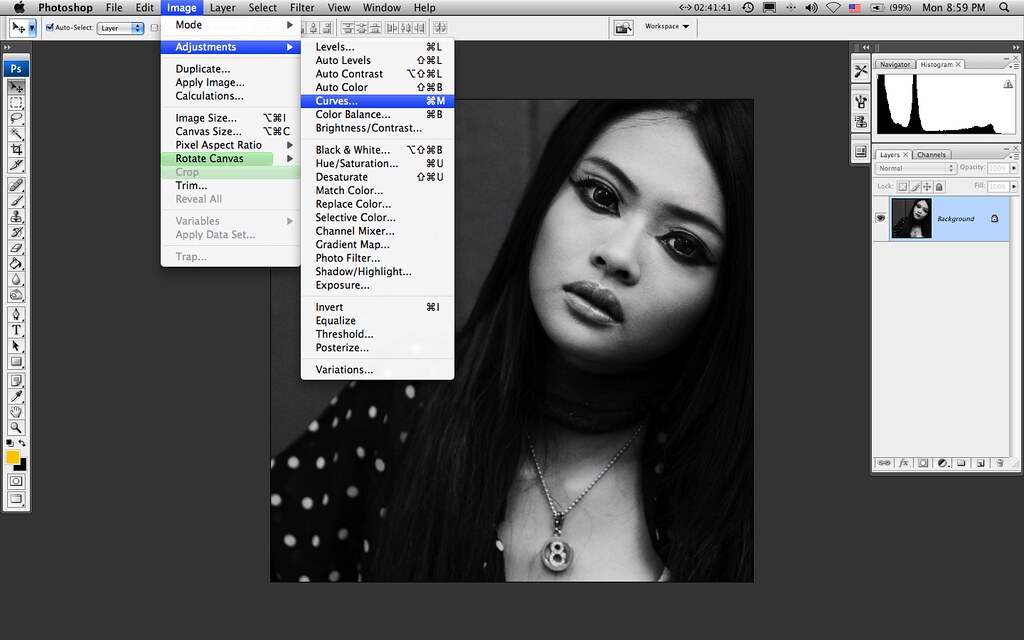
STEP 1 | Photoshop Curve Preset
1. First step is, just open up any picture and then click onto Image – Adjustment – Curve.

STEP 2 | Photoshop Preset
2. Next step is just do your own adjustment, whether you want to boost some colors, reduce some colors, do whatever you want to do with the curve, I’ve said before this tutorial is to show how to save those “Curve” as a preset, if you wanted to know how to get a beautiful tone, then you might wanted to check my Photoshop Tone eBook. I will not share it here because it will be unfair to those who have bought my Photoshop Tone eBook.
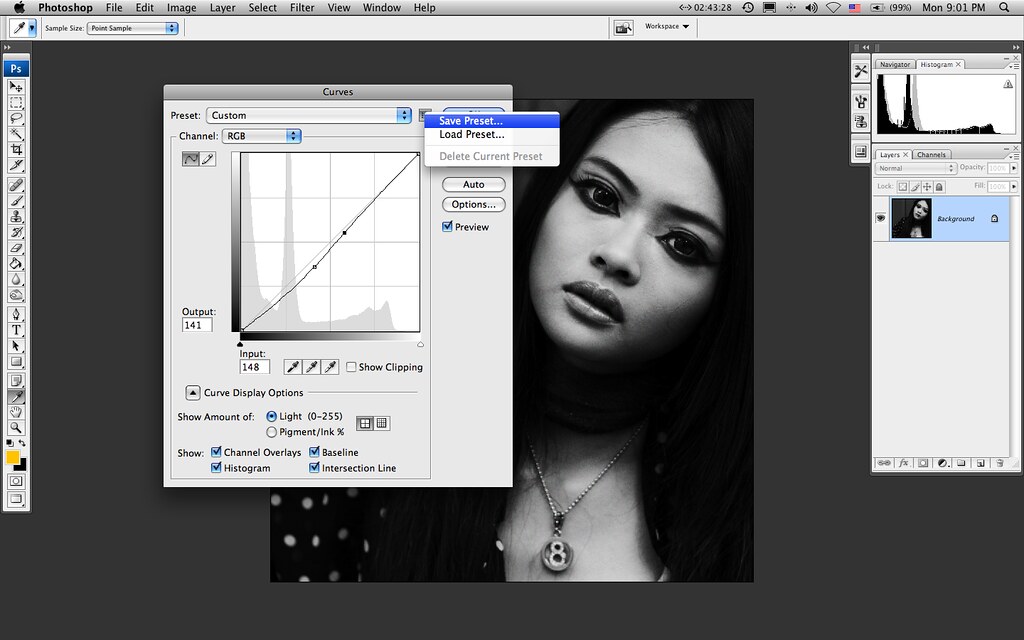
STEP 3 | Photoshop Preset
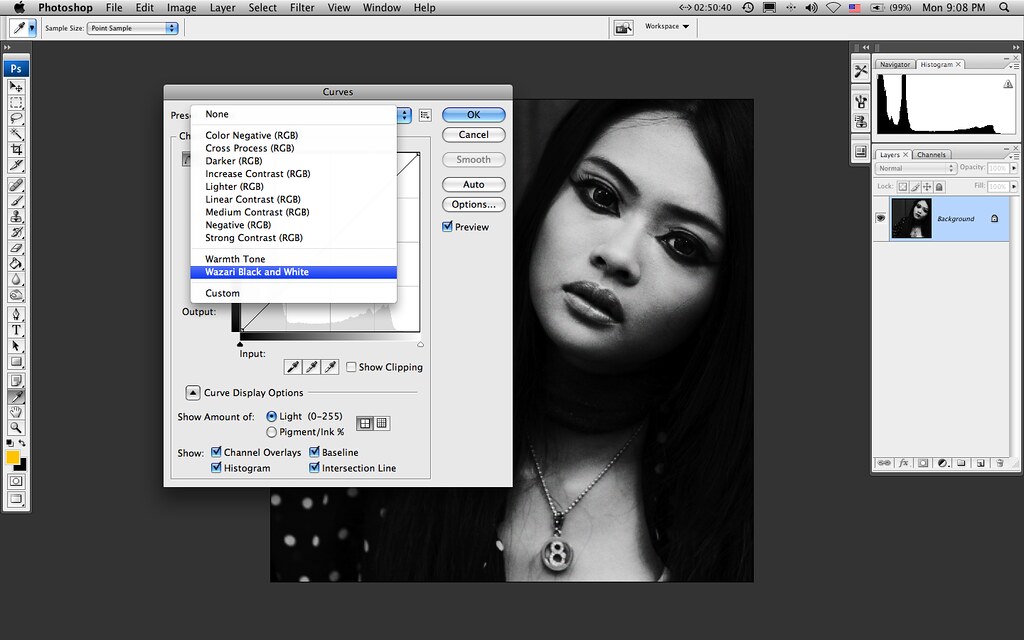
3. After you satisfied with your adjustment, don’t hit the button OK just yet, we want to save those Curve as a Preset. What you have to d is to click a small square button there, located to the left of the OK button, if you hover your move on top of it, you can see “Save Preset” like the above picture, just click that”Save Preset”.
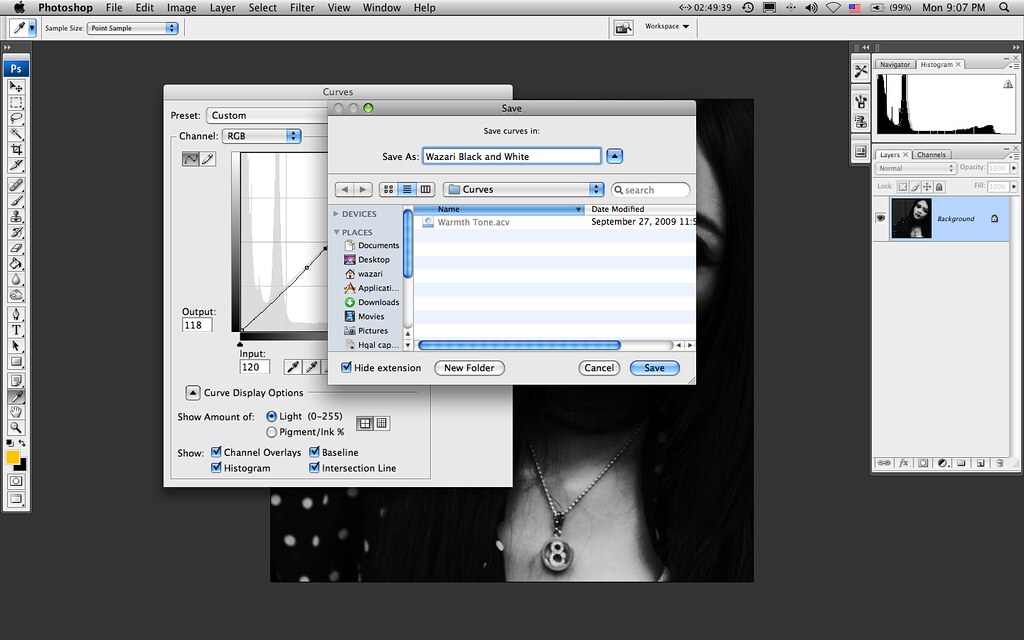
STEP 4 | Photoshop Preset4
4. After you click that “Save Preset” button, a new dialogue box will appear just like above, you can name the Preset whatever you want but it is good to name it with something that relate to your Preset, for an example if you just made a Warm Color Tone Adjustment, you might wanted to name it as “Warm Color Tone” instead of naming it with unrelated things like the city of the world, New York or London, if you have hundreds of a preset, you will be confuse what’s LONDON Preset will do, so name your preset with something related with your adjustment, Black and White, Deep Black and White, Classic Black and White as an example.

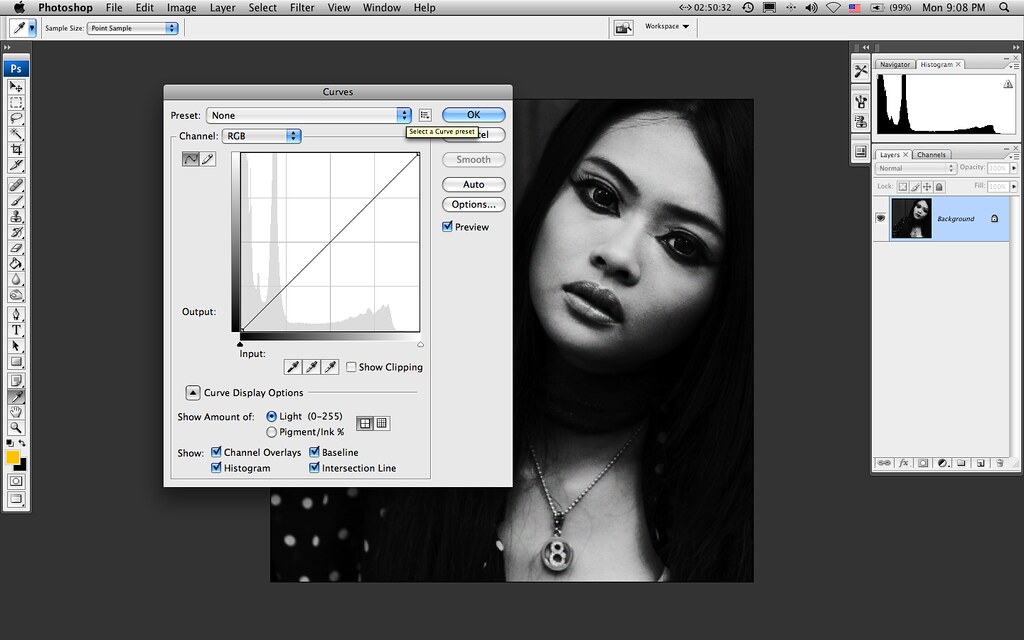
STEP 5 | Photoshop Preset
5. Hit the OK button once you satisfied with your Preset Name. Actually you’re done here, you can just save your picture and your preset was already save in your Custom Preset Curve Folder ( If You Choose To Save it in Curve Folder ).
STEP 6 | Photoshop Preset
6. So how are you going to use your Custom Preset? Very easy, just open up a new picture and follow the Step 1 until you get this dialogue box (Picture Above).
STEP 7 | Photoshop Preset
7. Last step is, just click your mouse over “up and down blue button” there, located to the left of small square box there until a new menu like the picture above appear. You should be able to see your new Preset from the drop down menu if you follow the tutorial correctly. Once you found it, just click the Name of the Preset that you’ve just create and then hit the OK button and you’re done and just save the picture.
Just to let you know that even though you have save the preset, it is still can be change, it is still customizable, if you think the preset that you’ve just create doesn’t work well with a new picture that you want to edit and think that it need some adjustment, don’t worry, just play around with the curve until you satisfied.
The reason why I don’t use Preset is because most of my pictures need a customization here and there, so that’s why I don’t use it but for those if you who wanted to edit a large amount of a pictures with the same lighting condition like a set of a pictures taken at the beach and you wanted to get the same adjustment or color tone, you can use the preset and get the tone evenly but if you wanted to edit a different kind of a picture, for an example, few pictures taken at the beach or a set of a picture with different lighting condition, you might want to do some customization or create a new set of Preset. Each picture is different and don’t ever think that one type of a preset will work for all kind of a picture.
Feel free to create as many preset as you wish so it will be easy for you to choose the right Preset for a different picture. Don’t forget also, you can SELL your Preset, actually it is a good business, maybe some of you especially newbie doesn’t know that a lot of Photographers especially in Europe or America sells Preset, its is a lucrative business, you know why? Most people are too busy to make their own customization, most photographers especially those who runs a wedding or portraiture business are too busy with other things, they want to work faster so you can help them by creating a custom made preset, and sell it. The best part is, you can sell it online through email, the file of the Preset is small.
So how to “Save” the Preset files so we can sell it? That’s a good question, some of you might already know the answer, just “Grab” the files from the folder and you are done, but if you still can’t figure it out by yourself, don’t worry, just keep on following my blog, I will show you how when I’ve a free time to write a about it.
In case you wanted to know how to get a beautiful color tone picture, how to get a beautiful color tone with The Curve, just click the banner below…
Related Post : Playing With Photoshop Tone | The Tone Does Make a Difference

Get The Secret HERE
5 Comments
Taufik
Thank u so much for sharing this bro. Very, very useful eventhough I also do agree with you that every picture needs different kind of treatment and 1 preset doesn’t fit for all. Nevertheless, this is a very good knowledge sharing. Thanks again, I learn something new for today =)
Pingback:
Pingback:
CMRatu
nice info.. 🙂
Pingback: