Newborn Photography Tips | How To Get a Black Background
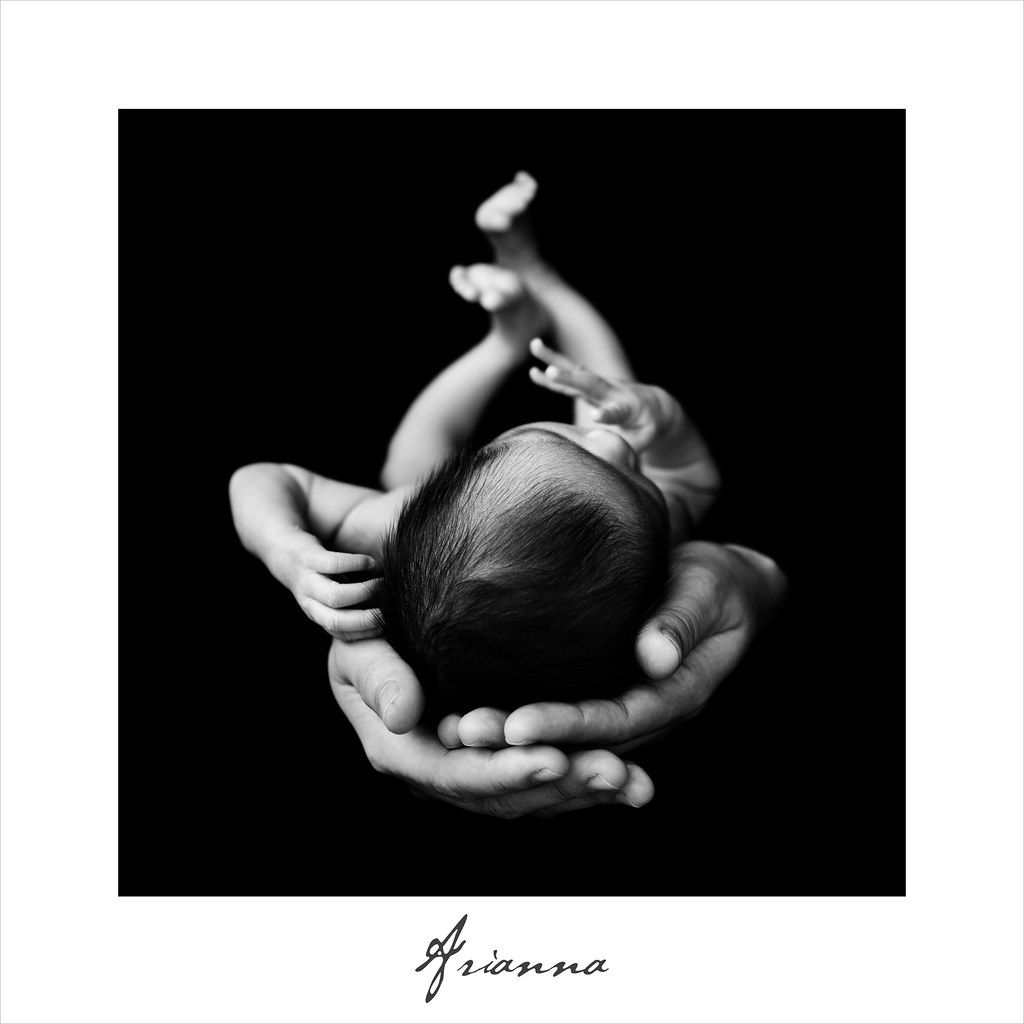
© 2013 Wazari Wazir | My Daughter Arianna | 50 mm | ISO 200 | 1/80 | F/2.8
This is among my favourite pose for my little baby, I’ve done similar pose for my my sons HaiQal and Raphael when they were few weeks old and this time it’s for my daughter Arianna.
A lot of my friends had asked me on how I did this photograph, actually it was pretty simply, you don’t need expensive studio lighting, you don’t even need a flash because I’m using a natural late afternoon light here. But off-course you need some other materials other than your DLSR and I believe those of you who have visited my blog frequently have a camera because this is a photography blog anyway.
So what are the things that you might need, the essential item, off-curse you need a camera, then you need a dark or black background, for this purpose I bought a new Black Velvet, 4 meter long, actually 2 meter long black velvet is good enough but 3 meter is better. Why black velvet? Because black velvet or that velvet absorb light better, so you can get a nice solid black depending on where you hung up the velvet.
Second thing is that, you need to have your spouse, in this case my wife to wear a dark clothing, long sleeve black T-Shirt work great, we don’t have dark long sleeve T-Shirt but in this photo my wife wore a deep blue T-Shirt, almost look like black. The most important is to have a dark clothing. Why? Simply because we don’t want other bright colors material screaming for our attention, we need the viewers to have an undivided attention to the subject, which in this case is my baby, so keep it simple.
About the exposure, exposure, you can visit my previous article Black Against Black Photography . Now lets us move on to post processing a bit.

© 2013 Wazari Wazir | RAW File After Converted to Jpeg | Step One
From the photograph above you can see, how I position my baby, it sit on my wife lap, and my wife wore a deep blue T-Shirt, it is not a pitch black, you still can see a separation between my wife T-Shirt and the black background there, some people like this look but for this tutorial, I will share with you on how to get the black to be solid black.
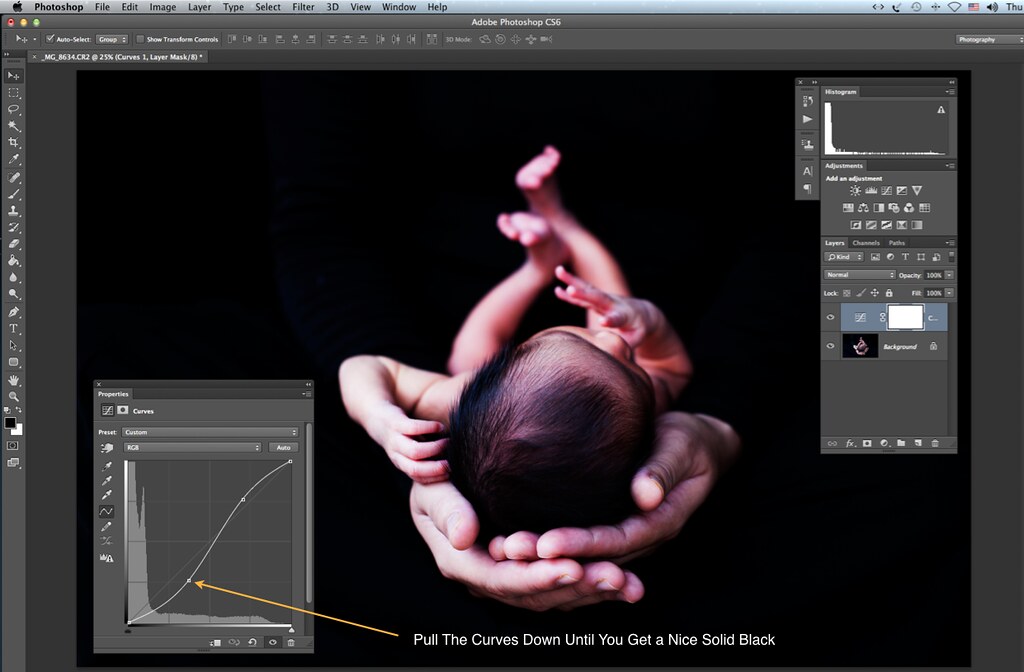
© 2013 Wazari Wazir | Arianna | Step Two | -S- Curve
The next step is very simple, to get a solid black, all you need to do is to make a simple classic “S Curves” in Photoshop to boost some contrast and make the outline of the blue T-Shirt invisible and blend with the black velvet. Just go to the Adjustment Layer and select Curves. Make a simple S curves like the figure above but you need to pull the lower curves a bit more than the upper curves.
Actually if you are happy with the color version, all you need to do is to flatten the image and save it, you might wanted to reduce the saturation a bit if you think that your baby skin looking too red to your eyes. If yu wanted to turn it into Black and White Photography, follow the next step.
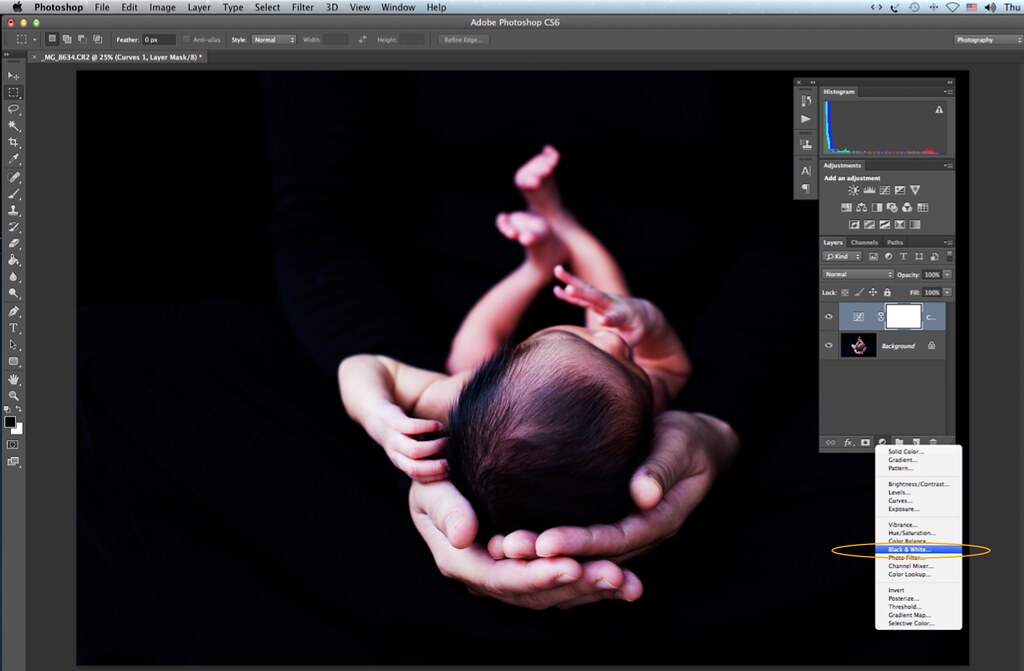
© 2013 Wazari Wazir | Photoshop Editing for Newborn
Now after that all you have to do is to create another adjustment layer, this time we want to turn it into Black and White. Just go to “Create New Fill Or Adjustment Layer” and choose Black and White. The location for the Create New Fill or Adjustment Layer is in the middle of the lower tab, on the left side of the “Folder Icon”. Once you found it, choose Black and White.

© 2013 Wazari Wazir | Newborn Black and White Photography Post Processing
Once you click the Black and White Adjustment Layer, you will get something like the figure above. You can fin tune the the contrast of your black and white by adjusting the variety of colour slider there, but actually there is not much colours to tweak, if you wanted a bit more black, you can drag the RED slider to the left a bit. If you wanted to brighten the face a bit, you can drag the YELLOW slider to the right, you can see the result in real time, so you can make an adjustment as you wish.
So if you are satisfied with your Artwork then all you need is to flatted the layer. Go to MENU > LAYER > FLATTEN IMAGE, save it and you are done. On how to make it into square and how to add title, it is a matter of personal preferences, it is a matter of visual presentation the hard work is done. Actually this type of a photograph will only look great if it was printed big, print it on canvas 20 x 20 inch looks great on your wall.
Now the top secret is out, what are you waiting for, happy shooting and editing…
*One last thing, if you wanted to learn more about Black and White Editing, don’t forget to hit the banner below…