Photoshop Tips and Tricks | Faded Memories | Muted Colors
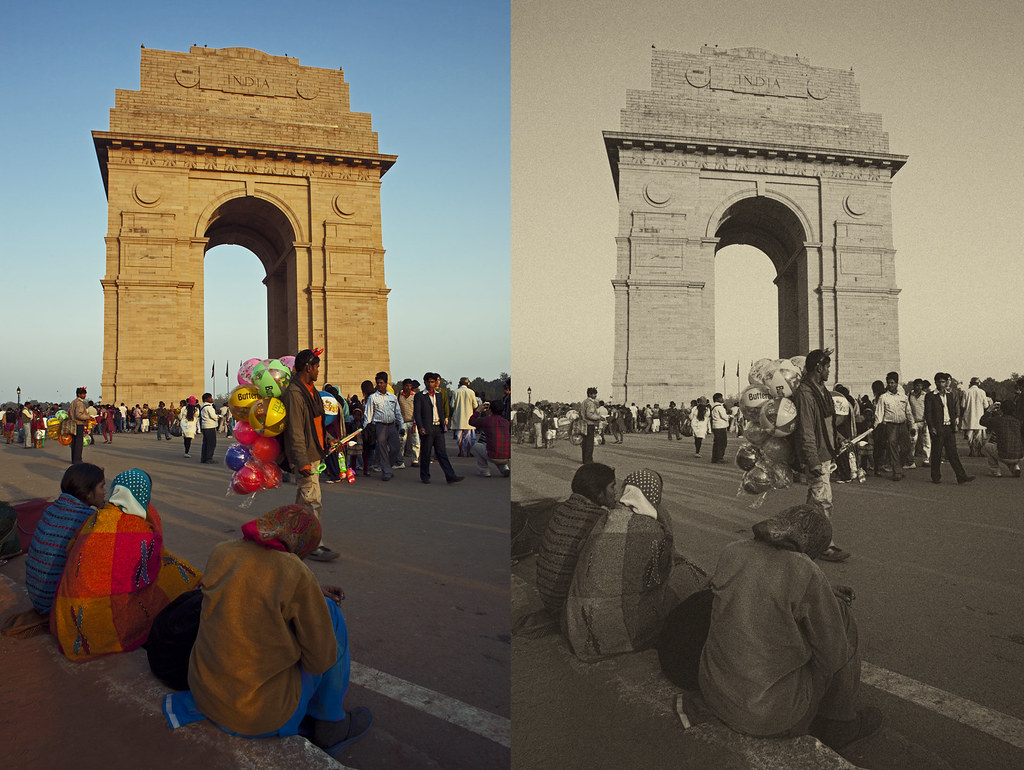
© 2012 Wazari Wazir | Muted Colors Step One | The Original (Left) | Vintage Version (Right)
I Just wanted to share my little secrets on how I did my tone in Photoshop, yes there are many ways to scan a cat and yes there are many ways to get this effect in Photoshop and I’ve tried some of them and sometimes I like one way more than the others.
On the left photograph above is the original picture, just minor editing done, it was taken in late afternoon just before sunset in New Delhi, for those who doesn’t know what’s the monument is that, it is the famous India Gate, this was taken on Sunday, so you can see the crowds there during weekend.
Anyway this is not about India Gate, but the tone, to get you start, just get any photograph, keep the original as it is, then make a duplicate and turn it into something like the picture on the right, vintage or sepia color, monochrome version. I will not going to tell you how to get the vintage look, for the time being you have to figure it out yourself or simple get my Photoshop Texture eBook and you will know how to get the Vintage look just like the photograph on the right.
The purpose of this tutorial is not to tell you how to get the same look just like the one I’m sharing it here but most importantly to get you the ideas behind. The possibility of using this simple method for your editing. Some people can think outside the box while others needs to be shown the way, something like that.
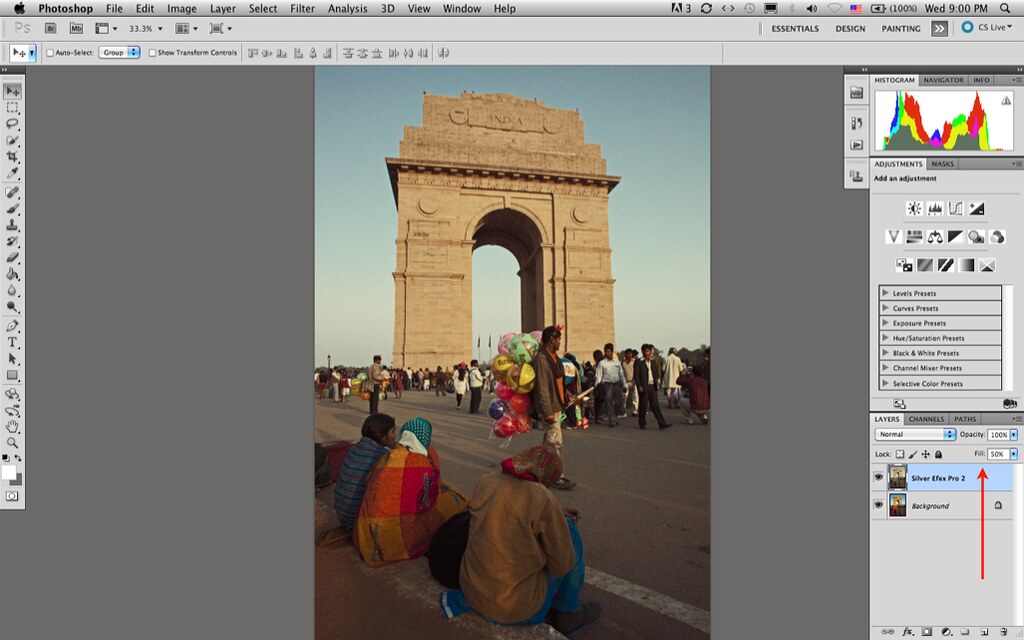
© 2012 Wazari Wazir | Muted Colors Step Two | Two Layers in Photoshop
Step 2 : Actually by looking at the screenshot above, no further explanation was necessary but just to clear the air, reads on. Now you have two layers open in the photoshop, the top layer is a monochromatic version or sepia version which have already edited to get that look.
The next step is pretty straightforward, all you have to do is just lower the opacity or lower the fill of the top layer, the vintage version (highlight in blue color – Red arrow), for the picture above I just lower the fill of the top layer to 50%, don’t ask me, what’s the difference if you wanted to lower the opacity instead of the fill? Just do it and see the result, don’t be afraid of making your own experiment, just take my tutorial here as the “Box” and feel free to think outside the box.
If you ask me again, can I put the original picture on the top layer and the vintage version underneath? I will say, why not, try it, and try lowering the opacity or the fill of the original version and see the result.
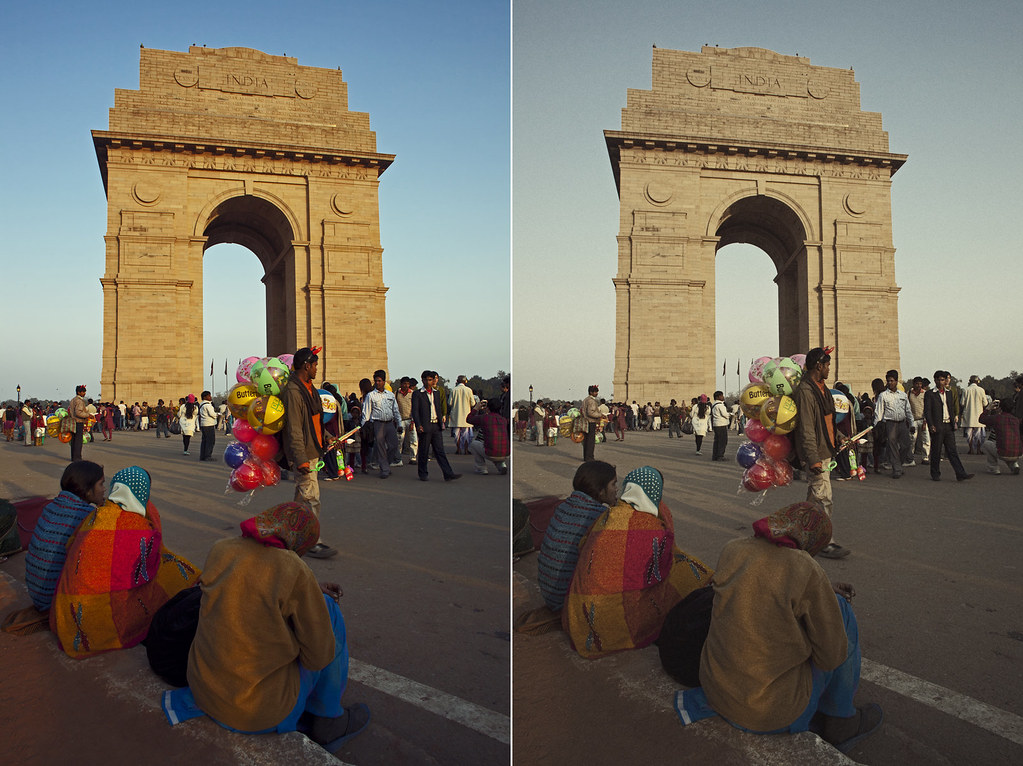
© 2012 Wazari Wazir | Muted Colors Step Three | The Result | (Left) Original | (Right) Muted Color
Very simple and straight forward does it? Now how much you wanted your end result to look like is entirely depend on you, just play with the opacity or fill, you can use 50%, 80% or maybe just 20% of the opacity. Just play with the slider because you can see the result in realtime, immediately and stop once you are satisfied with the result.
The point of this tutorial like I said before is just to get the ideas and when you understand how it works, you can apply it in your editing, if you don’t know how to turn your picture into vintage version there, then simply convert it into black and white version, and I believe you don’t need years of experience with Photoshop just to turn your picture into black and white. Reduce the opacity of your black and white layer and you’re done. Happy editing and experimenting.
*If you really need to know how to turn your picture into vintage look, just click the banner below…

One Comment
ifa athirah
hi mr wazir!ni 1st time saya baca tutorial mcm ni.tutorial yg ajar berexperiment instead of ikut step by step. really love your works!