Photography and Photoshop Editing | Before and After Editing
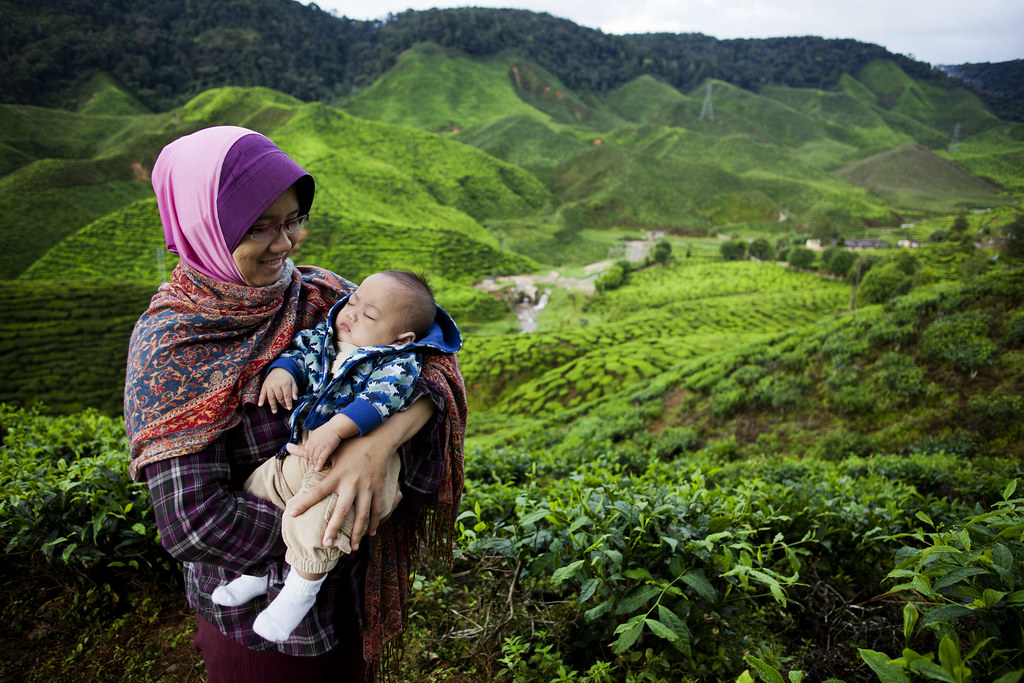
© 2011 Wazari Wazir | Cameron Highlands | After Editing With Master of Colors Technique
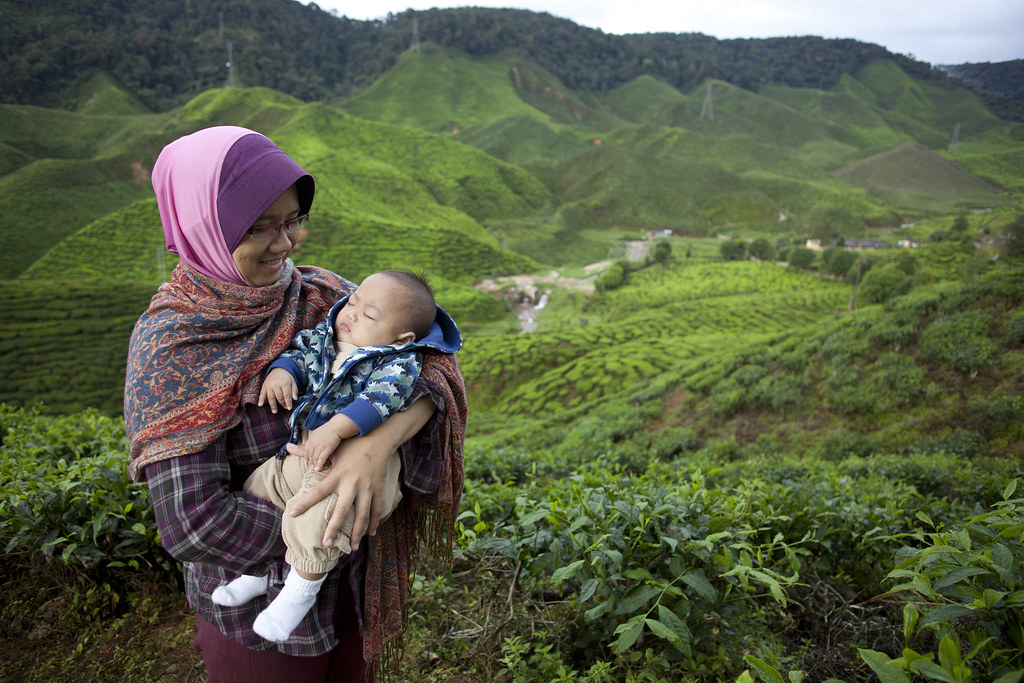
© 2011 Wazari Wazir | Cameron Highlands | RAW File Convert to Jpeg | Original Unedit
The photograph above were taken during our family holiday at Cameron Highlands in Pahang, approximately two hours leisurely drive from Kuala Lumpur city centre. It was famous with tea plantations and this one were taken at Bharat Tea Plantations at Tanah Rata.The weather was a little bit overcast, we arrive here somewhere around 07:45 Am in the morning, hoping to catch some beautiful early morning light but were very unfortunate because it was overcast.
I’m sorry about the quite length introduction since the title of this blog post is about editing and not about our journey here, I will get onto that later on. So let’s talk about editing here. For those of you who have been following me for quite awhile knew that most of the times I shoot in RAW and in this case yes I do shoot in RAW. For those who are familiar shooting with RAW will notice that the colors that came out from RAW file is a little bit dull, lack in contrast and flat.
For those of you who don’t like to spent their precious times in front of the computer, editing their picture, I highly suggest you to shoot in Jpeg sRGB, since it will look better than Adobe RGB, and if your exposure is right, no further editing needs to be done but on the other hand if you are like me, like to spent some of your free times playing with Photoshop or like to get the very best from your picture, in term of colors and clarity, I highly recommended you to shoot in RAW and if you have spent few thousand dollars on Semi Pro or Pro Level DSLR, it will make sense to shoot in RAw or at least try to shoot in RAW to fully make full use of your camera capability.
Just to let you know for the above picture I shoot both files simultaneously, meaning that I shoot Jpeg and RAW together and the file size for Jpeg is 6.4 MB and the file size for RAW is 25.1 MB. Did you notice the difference? Do you know why there is huge difference in term of file size between two of them. RAW file contained so much information yet to be fully developed and that’s why those who like to shoot landscape or playing with HDR will shoot in RAW, so that they can pull all the details from their RAW files, but then again you will only be able to see their big difference if you print those picture in big size like 20 x 20 inch and above but if all you want to do is printed them on regular 4R size, you won’t see much difference between those files.
About the editing, you can just play with level and curves to get extra color saturation but somehow if you only use that way, some part of the pictures especially on the face will be too dark or too light. No I did not use dodging and burning technique here to get the result but I use multiple layers and few masking for my editing. I try to do my editing at minimum, you won’t see a very huge difference from the picture above and that’s the idea, to keep it minimum and unlike HDR editing the difference between before and after editing is quite obvious.
There are few ways to get this result but for the picture above I use one of the technique from my “Master of Colors Editing Technique” to get the result. Among the problem people face when they try to boot the colors in landscape that involved face is that, they tend to over saturated the face or the skin tone and look unnatural. To counter this problem, we need to mask certain part of the picture so it will not get affected of less obvious.
Other than adding extra punch to the colors of this picture, I also clone few electric cable above my wife head which I think is a distraction to this pictures, and that’s it. Talking about the editing, the final output largely will depend on you, how far you wanted to edit and if you think the colors is a bit too much, you can always reduce the opacity to your satisfaction. I know that not everyone have a lot of times to spend on their computers but to those who like to fine tune their pictures, editing can be fun.
Whether this picture is edited or not, the story is still there, it os about mother and her sleeping son having a great times at tea plantations. The composition is coming straight from the camera, I just make the picture look a bit more interesting to my eyes by enhancing the colors a bit. You may like or dislike the result but this is how I want o to be presented.
Before I finish this post, if you like to know how I get this result beyond level and curves, you might wanted to check my Photoshop “Master of Colors” eBook from the banner below. Hit the banner and you will get the answer.

3 Comments
devon wedding photographer
I also still use my D200 for lots of work and completely agree it’s all in the post production editing that makes the difference.
Jeffrey K. Edwards
Wazari – I couldn’t agree more with your post today. Shooting in RAW requires a certain amount of postprocessing work – how much depends on what you hope to produce. Truly unique images often require a fair amount of editing in PS and/or LR. I think your approach with the Master of Colors and Toning in PS are a great introduction into what is possible!
Taufik
To sum up, Master of Colors rocks!!! =)