Photoshop Tips & Tricks | Selective Coloring | Black and White and Colors
In this quick Photoshop Tips and Tricks I would like to share with you among the most favorite selective coloring in Photoshop where you can see some image in colors while some other part is in monochrome or in Black and white. Just to let you know also that there are many ways to get this kind of effect, I’m sharing with you one of my favorite technique even though I seldom do it because I’m not a fan of selective coloring but I like to show you how to do it, if you are interested to know.
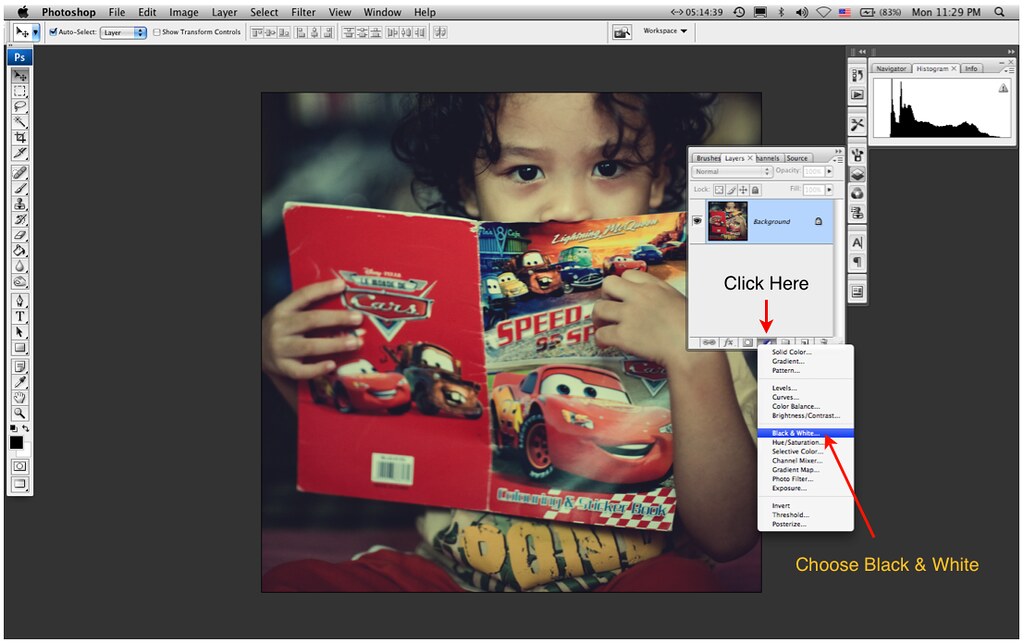
STEP 1 : Just open any picture in Photoshop, hopefully a picture with bright looking colors, or with lot’s of colors. Then click the “Create New Fill or Adjustment Layer” and when a new drop down menu appear, just choose “Black and White”. Then follow the next step.
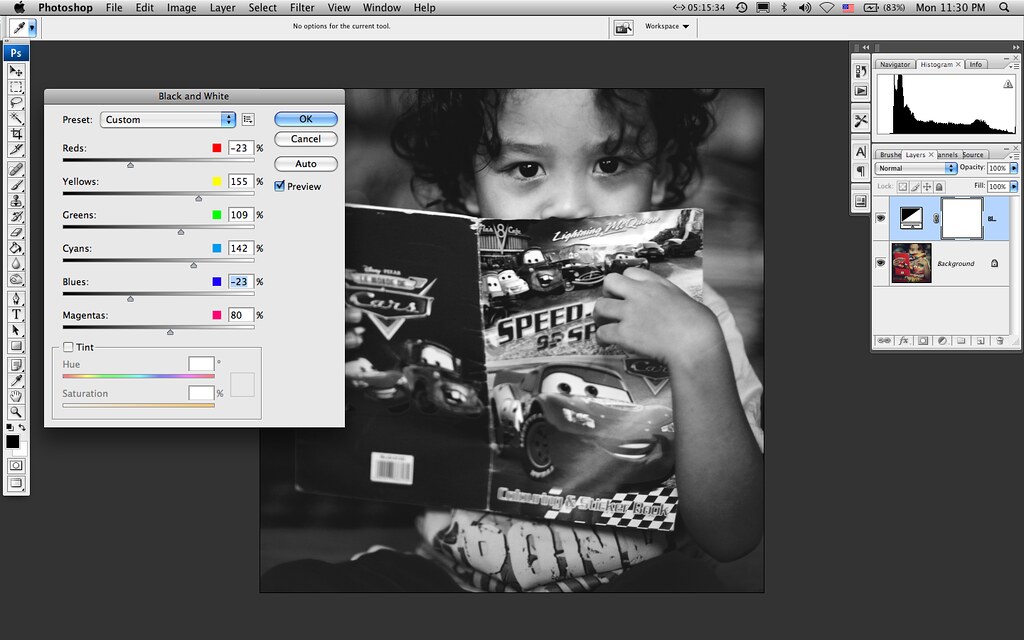
STEP 2 : You will get something like above picture, you can adjust all those slider to your liking but since this is not a Black and White tutorial, I will not show you what to adjust, just adjust the slider if you need to, this tutorial is about selective coloring. If you don’t have anything to adjust, just click OK.
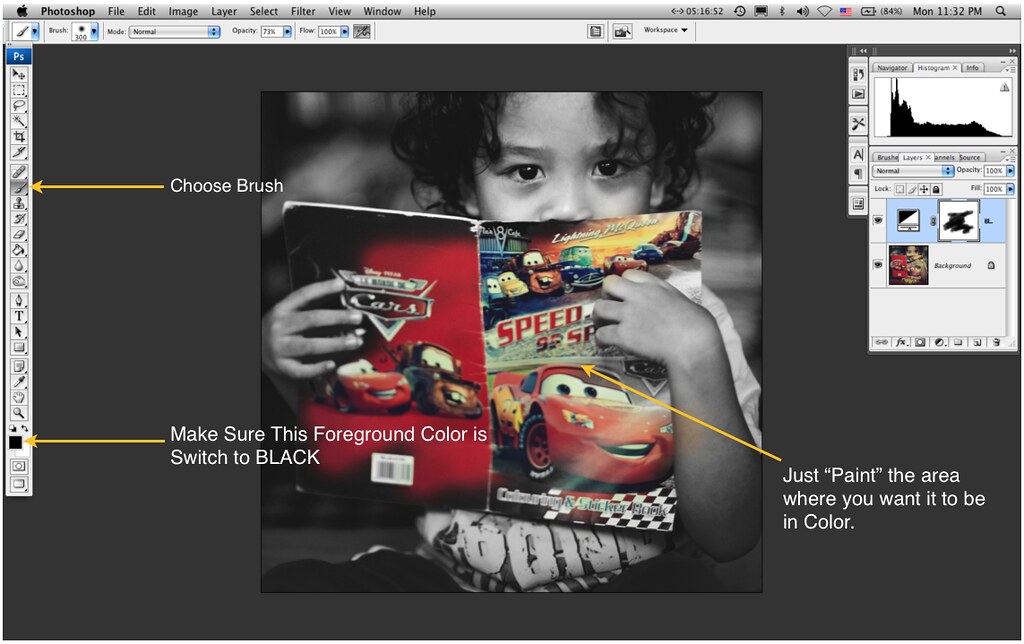
STEP 3 : Once you click OK, you will get a new layer on top of your picture which also known as “Adjustment Layer”, the beauty of using adjustment layer is that, it will automatically create a Mask or Layer Mask, the “White Box” empty square one, but in this picture, there are some “Black Stroke” because I’ve painted it.
Now all we need is to paint those “White Box” or Mask with Black, since the MASK is White, we need to paint it with Black paint in order to have an effect. So just make sure you set the Foreground Color to Black, if it was White, then just hit ( X ) button on your keyboard to switch it to Black, actually X button is a shortcut key to switch between Black and White foreground color.
Once you get the Foreground color to Black, just choose a Brush, a soft brush would be nice and just leave the Opacity to somewhere between 50-70%, In the Menu Bar > Select, you can see the Opacity and just drop down the Opacity so your brush isn’t that hard or sharp. Now all you have to do is just “Paint” on the area where you want it to be in colors, just simple, you can make your brush size bigger or smaller by using simple keyboard shortcut [ to reduce the brush size and ] to increase the brush size.
If you think you have painted just a little bit outside of the desired area, simply hit X button on your keyboard to switch back the Foreground Color to White and painted the area where you don’t want it to be in color and once you are done just hit back X button and continue the process. It will take quite a bit of times before you fully grasp this technique but just enjoy the process and never afraid to make a mistake. It is part of learning process.

© 2011 Wazari Wazir | Photoshop Tips and Tricks | Selective Coloring
Once you’re done, you can Flatten the image, save it and share it with the world. Like I said previously in this tutorial, there are many ways of doing things in Photoshop, but it is good to know other way of doing things, some way are better and faster than the others, never stop learning and never stop experimenting.
I use almost the same process in my Master of Colors eBook , where you can use Masking and “Adjustment Layer” to control the colors and how you can make your colors richer and vibrant with it. If you can think outside of the box, you can figure it how already but it doesn’t cost you a bomb to check out my eBook, just hit the banner below. Have fun with Photoshop Selective Coloring.

One Comment
Ariff
thanks for the tip…