Photoshop | The Tone | Before and After
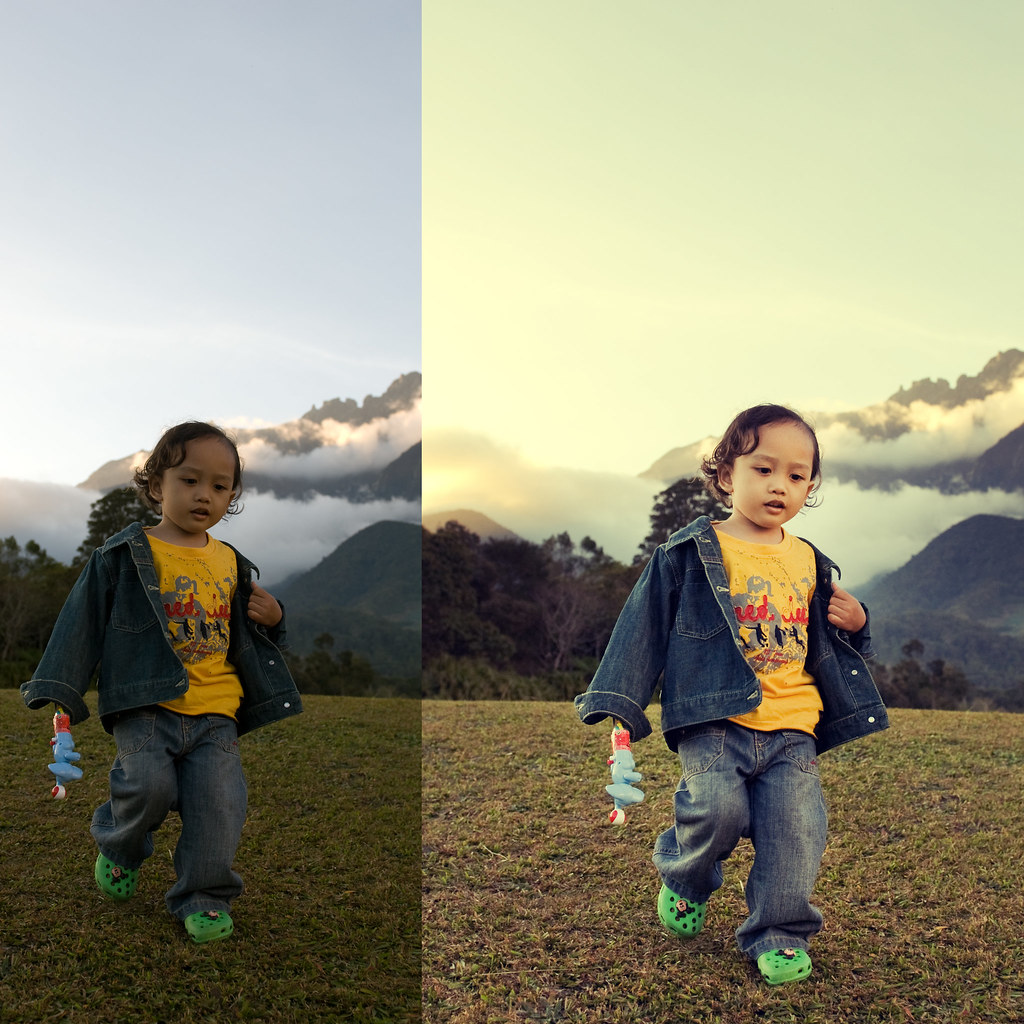
© 2010 Wazari Wazir | Photoshop | Before and After | Mesilau | Sabah
This is Before and After Photoshop Tone Editing. On the left side is RAW picture unedit, I did convert it to Jpeg, so I can upload it here. I shoot most of my son picture in RAW. If you look at the original picture on the left side, it is a bit dark, before proceed with the Tone Editing, first, I need to brighten the picture a bit, I use ACR or Adobe Camera RAW to adjust the brightness of the picture, if you don’t shoot RAW, you can use Level or Curve to brighten up your picture, this is what people usually called Global Adjustment, where you edit the whole picture not just a selective area.
I did not teach Global Adjustment in my Photoshop Tone eBook because it was too basic, get a dark picture, brighten it a bit, that’s it very simple procedure, so if you plan to bought my eBook about Tone, take note about this, I did not show a tutorial about Global Adjustment. After I get a decent picture then only I do my Photoshop Tone. It is really straightforward, in this case I use Curve to get the Tone by adjusting each RGB Channel separately, you got the tips already, so you don’t need my eBook if you take you time to play around with the Curves.
Tone like this is not for everybody, some people like to maintain “Original Skin Tone”, so this eBook will not benefit you but to those of you who like to play around with the tone then play with it, I did not play with the Tone for my Official Assignment, I just give my department the original picture, untouch, what I got from the camera is what I gave to my department. No need Photoshop for my day to day work.
I would like to let you know that not every picture will look good with the Tone, some picture look great with their original colors, maybe with a little bit of contrast and you are done, no need further adjustment but for me I like to experiment, each tone sometimes can add drama or mood to a picture, have you seen any movies lately, did you notice the colors of the scene, maybe you concentrate more on the story than the cinematography but for a photographer like me I like to see the picture in the movie, the colors, the set up, the location, the props, the costume, the lighting, the angles and everything that on the Big Screen, the story does not interest me so much, it’s the picture that I want to see the most, the Cinematography “The Art of Making Motion Pictures”.
My point is get the right picture first before you start doing the editing. Editing is just an enhancement. We must get the good or right picture first, the picture must be stronger first with or without the editing, if you have the good picture and combine with the right kind of editing then your picture will be more than just normal picture, your picture will be stand out among the rest. For an example, if you go out doing photo shoot with many photographers, shooting at the same location or shooting the same model at the same location with the same lighting, I mean natural light here, in the end it’s your editing that will separate you among the rest.
Here’s another tips for getting the right picture with the tone, use natural light, if possible get the picture that you shoot in the early morning or late afternoon, and why not try it with backlighting or side lighting, with back lighting you will get warm effect with the tone, what I mean with side lighting is, the sun is still behind your subject but not directly behind it but on their side, left or right. Just to let you know that all my son picture that I was editing with the tone taken with just natural light, I don’t use flash for all my son pictures, natural light is good enough for me, it’s free…
Related Post : How To Make a Custom Photoshop Preset

Get The Secret HERE
6 Comments
Pingback:
Pingback:
Pingback:
Pingback:
Kinoz
Cool, the background seems to be Gunung Kinabalu… 😀
Wazari Wazir
@Kinoz, tepat sekali… 🙂